Motors, Propellers, ESCs, and Servos
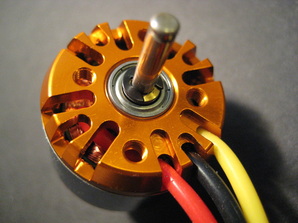
A motor has several different numbers that give information you may want to know. The first two digits of the four digit number is usually the diameter of the stator that has the wire windings on it. The second two digits are the thickness of the stator. The KV is based on the winding of the wire on the stator so a motor of one diameter and thickness can be wound differently with different KV ratings.
The higher the KV the smaller the prop you will use and the faster it will turn. You need to know the KV rating of your motor. The lower the KV the bigger the prop and the slower it will turn. You also need to know the manufacturer's amp rating and suggested prop size for the motor. The manufacturer's amp rating will be based on the size of the motor, the winding pattern and the size of the wire. If you use too big of a prop that draws too many amps the motor will get hot and may burn out. If you use too small of a prop you won't have the power the motor is able to give.
When you are trying to see if how one motor compares to another, compare the size and weight of the motor, KV ratings, watt ratings, and amp ratings. We get many questions asking if a different motor will work on our planes. There are too many motors out there for us to know them all. In most cases you can make any motor that has a similar size and watt rating as the motors we are using work on our planes as long as you have the right propeller, ESC and battery set up. Our suggestion is start with our recommended motor size and KV ratings. This is especially important if you are new to the hobby. There are many RC shops and other flyers who will try to get you to modify the motor and prop on your first plane because that is what they sell or use on a different type of model. We know our planes fly well with our recommended motors. It is also easier to trouble shoot what is wrong when you use familiar set ups.
A big motor may be fun to fly in a flying wing with the motor on the back but you have to use bigger batteries or add lead to the nose to balance your plane. Big motors use more power so you have to have bigger ESCs and batteries which adds weight to your plane making it need more speed on take off and landing. Some of my favorite planes are my light built planes. To get a plane light you have to make good motor and battery choices.
To raise or lower the amps the motor is using increase or decrease the size and pitch of the propeller you are using. Try the manufacturer's prop suggestions and look at what other flyers are using to determine the prop to use on your plane.
All new motors with three power wires coming out are 3 phase motors. They have to have a speed control to run. They don't have brushes on an armature. They last much longer because they don't have the brushes to wear out. Their ESC (electronic speed control) sends pulses of power through the wire windings on the motor that work with the magnets in the bell of the motor to turn the propeller.
Note on propellers... One inch of prop equals about 2 pitch so a 7x6 prop has about the same thrust as an 8x4. The first number on the prop is the diameter in inches. The second number is how many inches forward the prop will move with one rotation. Not all propellers of the same rating have the same thrust or noise level. You will find your favorites over time but our suggestions for our planes are inexpensive, quiet and some of the most dependable props we have tried. The prop has to be matched to the motor, ESC and batteries.
On some of our smaller planes like the Scythe and Pelican the 2812 motor is bigger and stronger than we may need. A good way to decrease the amps the motor will use and to decrease the prop torque on the plane is to use a smaller prop or to cut the prop down in length. It is hard to find a good APC style 5 " or 6" prop with a 6 pitch so I will take my chipped or new 7x6 props and cut them down. Cut down props are less likely to break and run quieter but they are less efficient.
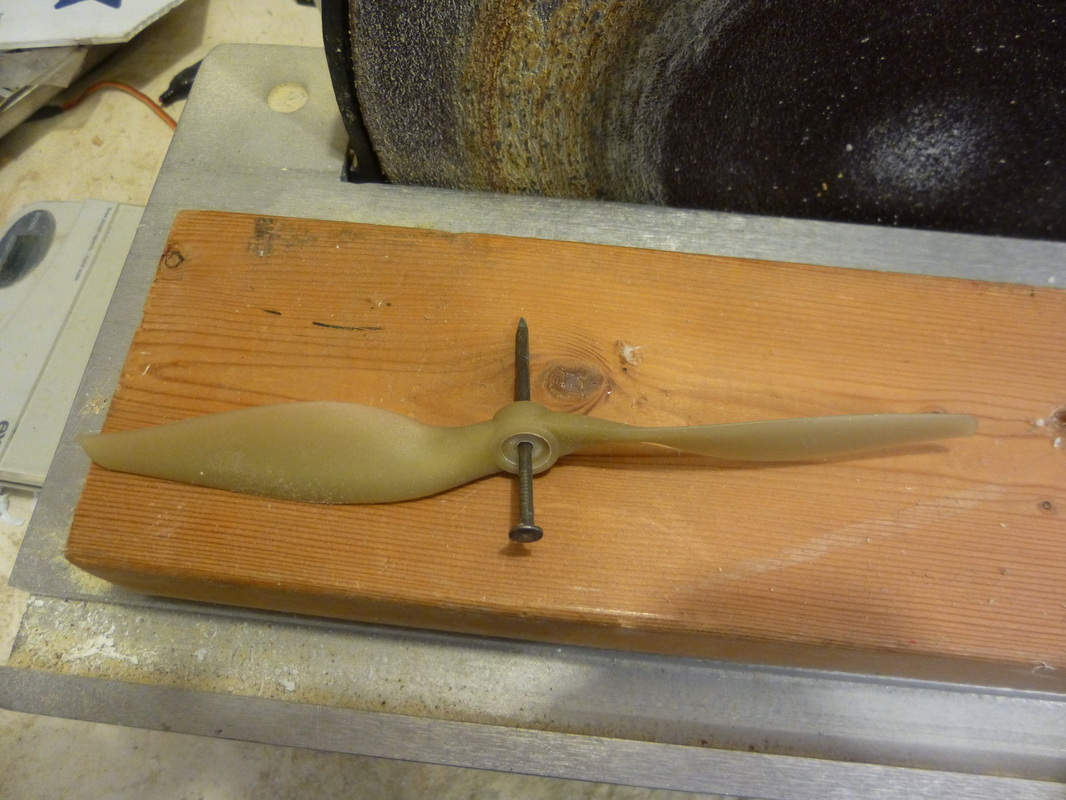
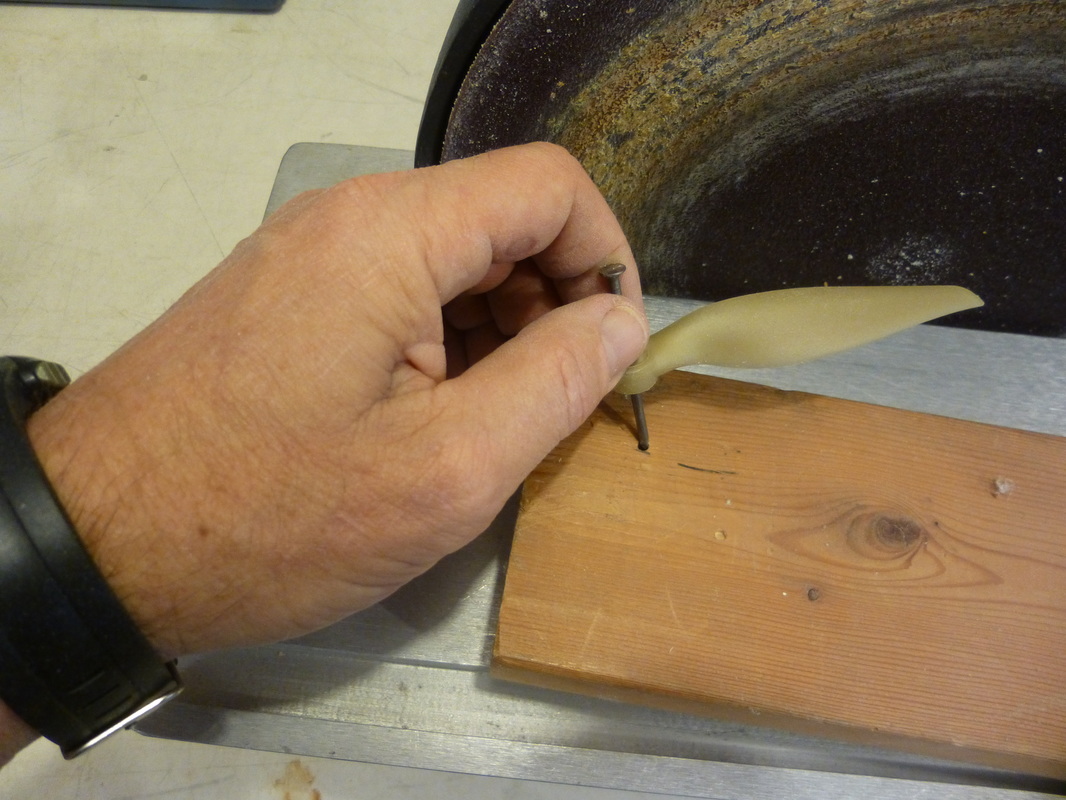
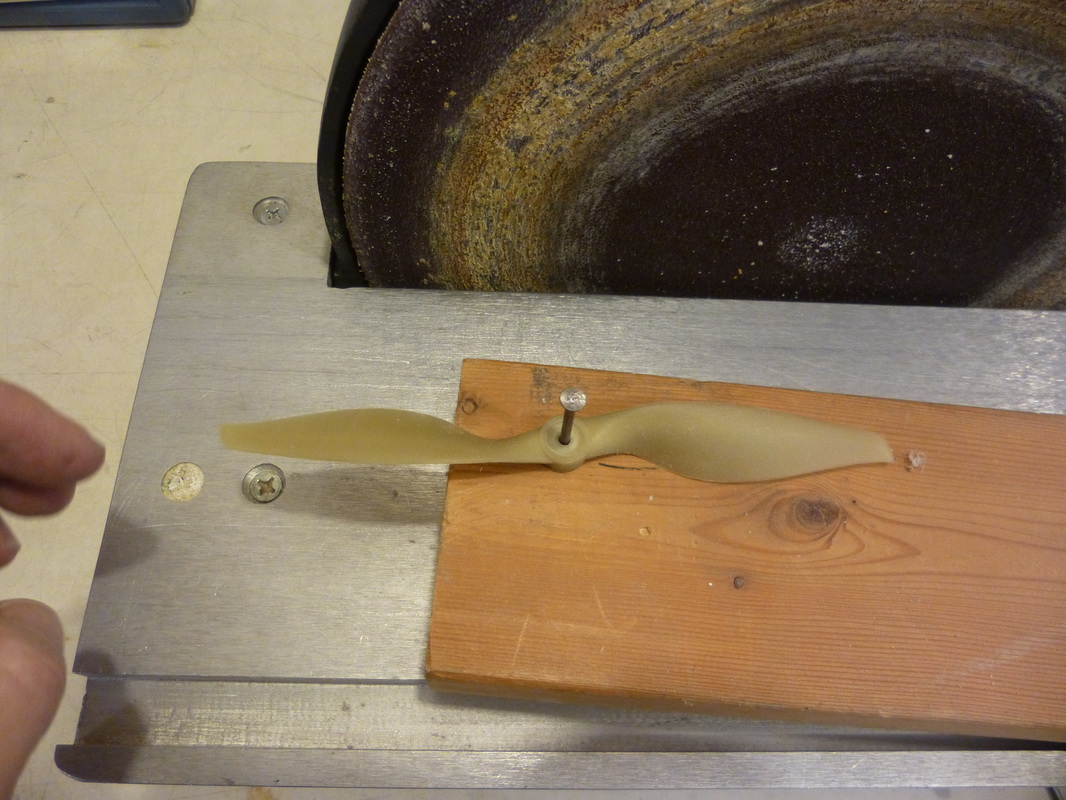
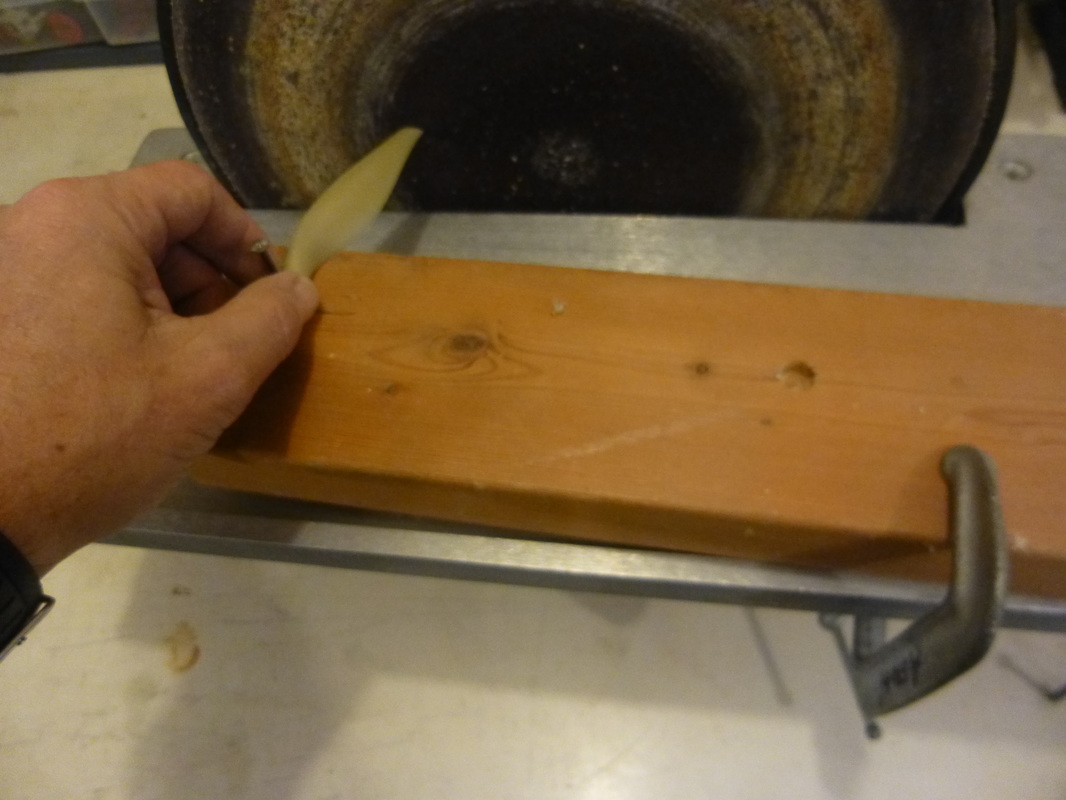
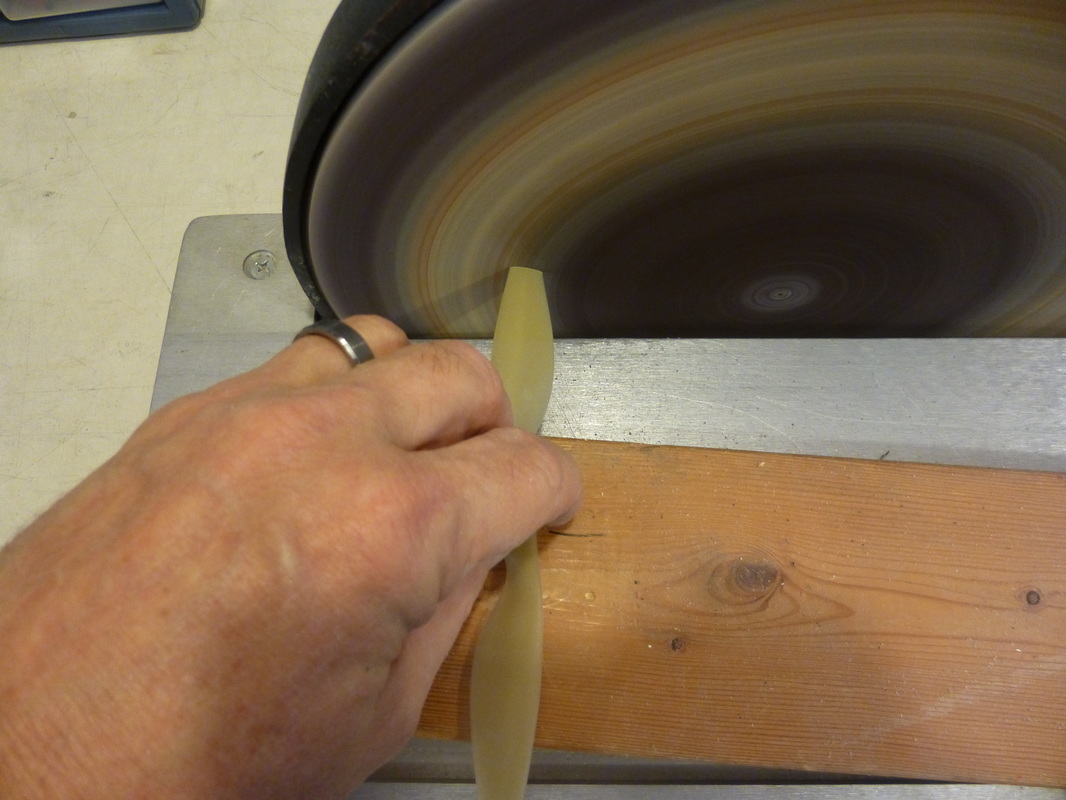
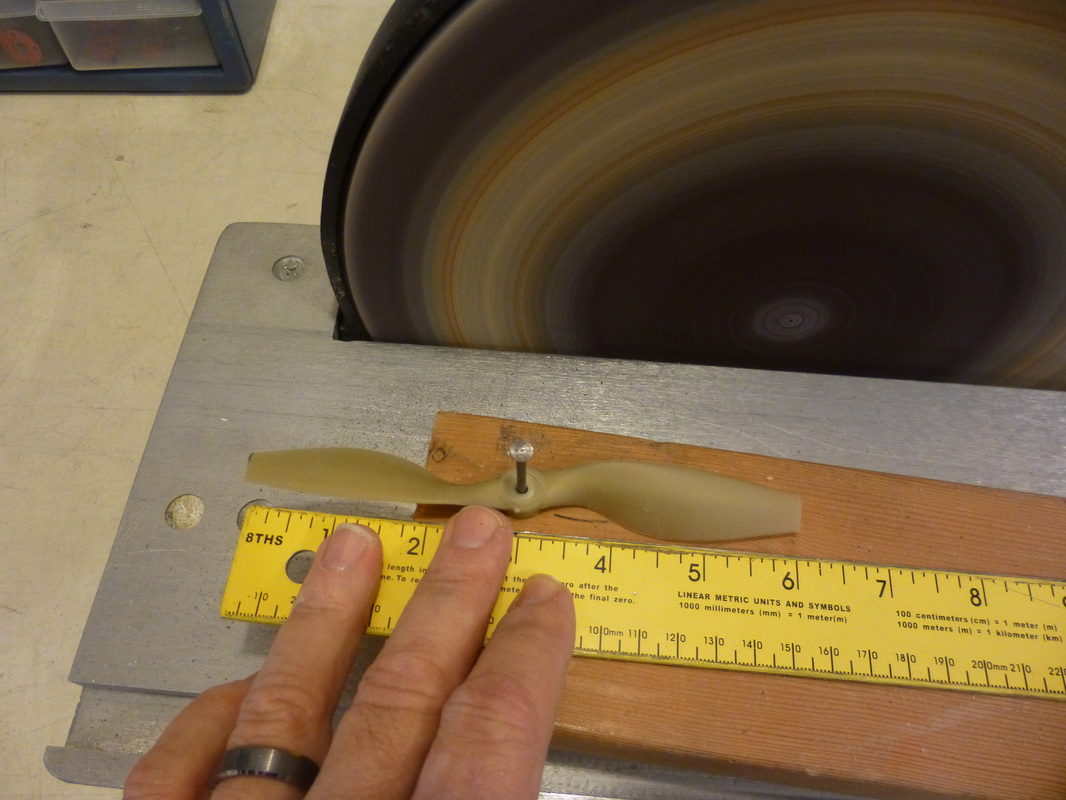
If I want to cut off a prop I find a nail that will fit tightly in the shaft hole on the propeller and drill a hole in a board that the nail will slide snugly into. I put the nail through the prop and into the hole in the board. I then clamp the board to my disc sander table and position it so the prop will touch the sander when I rotate the prop. When I rotate the prop all the way around it will cut the blades of the prop to the same length. See the pictures at the bottom of the page.
It saves time and money to have one motor, propeller, ESC, servo and battery size that will work on many of your planes. We design our planes to use two basic motor sizes which are the planes under 50" and the planes over 50". Our parts list on our web site will help you get the right set up for your planes. We have chosen the quietest, most efficient, brushless electric motors, ESCs and servos we can find while still providing great performance. New flyers frequently ask if the motors they already have will work. It is impossible to know and test all of the motors but here are some guide lines to go by.
Our Pelican, Albatross, Assassin, Widowmaker, Roswell, Pelican, and even our Scythe can all fly with 120-250 watt 1400-1800 kv 14-22 amp motors. We recommend you use a 25-35 amp speed control (ESC) and 3S (three cell) 11.1 volt 1300 mA lipo batteries. Our favorite motor is the CF2812 – 1534 Kv motor that is under $7 at some suppliers.
Our Storm Chaser, Titan, Grim Reaper, Deep Reaper, Deep Reaper XL, and Hercules all fly well with 3530 – 1400 KV motors (with a 9×6 prop) or 1700 KV motors (with a 7×6 prop). You will need a 35 to 60 amp speed control to use these motors. Make sure you get the hardware pack that goes with these motors, they aren't expensive but not always included with the motor.
If you want more power you can upgrade to the 3536 – 1800 KV motor with a 9×6 prop but it cn pull 80 amps so you need a high rated ESC and battery set up to use this motor.
Your speed control will need to have a 3 to 5 amp BEC built in or you will need to add a separate BEC to provide power to the receiver and servos.
For motor shaft modification showing how to put a prop adapter on a larger motor click this link.
Here is a video on motor shaft modification. LINK
There are many motors and speed controls that can work on our planes. If you are looking for a motor:
1. Look at what the other successful flyers are doing and copy them.
2. Have the right amount of power/watts for the size of the plane,
3. Your electronic speed control (ESC) should be rated to 1-1/2 times the rating of the motor,
4. The motor/prop air speed is appropriate for the plane design
5. There is enough prop clearance
6. You can get the plane to balance with the motor on the plane
ESC or Electronic Speed control
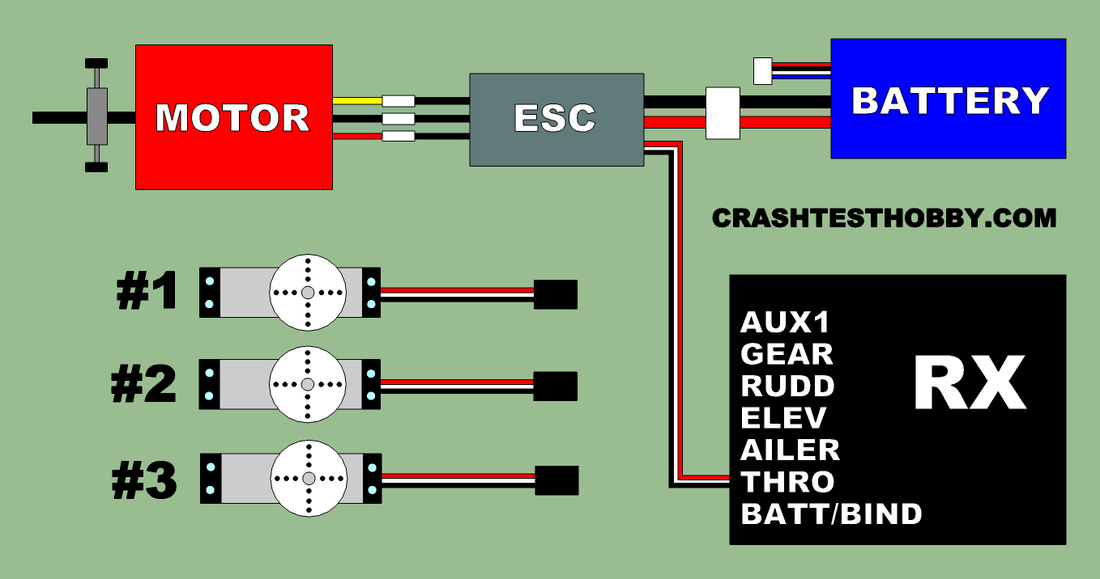
Look at the schematic drawing below to see how the ESC is set up. The ESC takes power from the battery and runs the motor and radio. It is the throttle for the motor so it plugs into the throttle plug on the ESC. It has a rating of amps and voltage. If you exceed this rating the ESC will get so hot it can actually catch on fire or at least melt the solder off the board and stop working. If you accidentally wire the battery backwards or even touch your red and black wires backwards to the battery your ESC will be destroyed in a second and cannot be repaired. This is not a manufacturer defect but an error by the person doing the soldering. It happens so fast that I have mis-wired and burned out several ESCs over the years. Remember red power wire to red ESC wire and black to black.
Most ESCs take the power from the battery and split it to power the radio and the motor. Most have a voltage regulator that gives the radio about 5 V and the motor 11.1 volts which is a 3S or 3 cell lipo battery. If you are using 4 cells or 6 cells your ESC may need an additional BEC voltage controller to get power to your radio. Your ESC has to match the battery and be able to handle the amperage of the motor.
Most ESCs are designed so they have to be armed so they will run to protect the flyer from unwanted starting of the motor by turning the throttle off. When you set up a new plane you will need to trim in your motor throttle setting. Use the throttle trim on your transmitter to adjust the point the motor starts turning or you may not have peak power at the top of your throttle on the throttle stick and the motor may not start turning at low throttle. If you turn on your radio and the ESC is beeping, trim the throttle down until it stops beeping to arm your ESC so it will run. If the motor starts to turn prematurely or won't stop turning, trim the throttle up or down until it stops.
Choosing the right servos.
Servos are the robot motors that take the command from your transmitter/receiver and turn it into movement of your planes ailerons, elevator and ailerons o they will do what you want them to do. Carefully look at the specifications of the servos you choose and read the customer reviews. We frequently see and hear stories of people having control problems because they choose the wrong servos.
Servos come in many sizes and with many options. There are giant servos, standard servos, mini servos and micro servos. The planes we design use standard size servos for our planes over 50" or planes where the motor is drawing over 25 amps, and the mini servos for the planes with wingspans less than 50" that use less than 25 amps. The standard size is bigger and stronger and the mini servos are smaller and lighter. Standard sized servos weigh three times more than the mini servos but they are three times stronger. You want to choose a servo that has about the same thrust as the weight of the plane you are going to use it on. If your servo is too small it will fly your plane until you start doing aerobatics and dives then it will break, jam or stall and you will loose control of your plane. Many flyers stall their servos and think that something is wrong with their radio. It is important to have the right size servo.
If your plane is under 48″ wingspan and using the smaller motor I recommend MG90s, MG90S or HS82MGs servos. If your plane is bigger or carrying a load you may want to go to the standard servos for better control of your plane. If you are going to fly heavy, fast and hard with the smaller planes you still may want bigger servos.
Notice all of the mini servos recommended have metal gears. I have broken so many nylon and plastic geared servos that I don’t recommend anything but metal gears in this size class any more. The larger servos have gears that are so much bigger that the nylon and plastic gears can handle the loads on them but it gives me peace of mind to have metal gears on my servos.
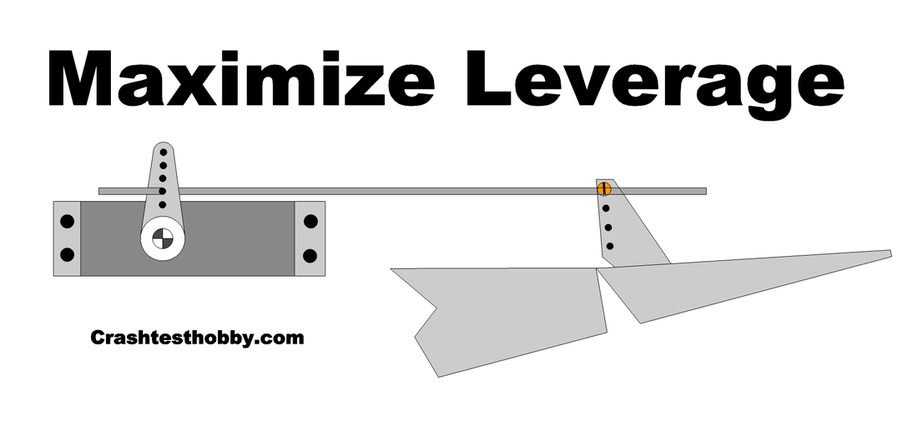
Get the most leverage from your linkages. This is very important!!!! See the image below.
You can double the strength of your servo buy the way you connect it to the elevator, elevon, aileron or rudder. The strength of your servo has as much to do with how you hook it up as it does with it’s size. Newer flyers take note!!! This is one of the most frequent mistakes new flyers make!!!
You should connect the push rod close to the center of the servo arm and at the very tip of the horn on the elevon, elevator or rudder for the best leverage and the least strain on the servo. I frequently see flyers who do this backwards and they can’t figure out why they can’t control their plane. More movement does not give you more control in fact it can make the plane uncontrollable. We recommend only 3/8″ (1cm) movement on the flight surfaces on most of our planes. We see flyers trying to fly with 1″ (2.5cm) or more. We design our planes with big moving surfaces to decrease drag and increase stability but those big surfaces can make the planes uncontrollable if they are moving too far or are flexing or twisting in flight.
Make sure your hinge line is tight and the servos aren’t moving in the foam in the wings and fuselages. You should be able to move the elevons, elevators and rudder and turn the servo arms when the radio is off. This is also a good time to see if the elevon, elevator and rudder are stiff enough to control the plane. It is also a good time to see if the hinge line flexes up and down without moving the flight surface and if servo moves in the foam and if the horn on the flight surfaces are glued or screwed in well enough to hold up in the air. Always remember the forces in flight are much higher than you think they are. Build your plane to survive.
-Lee
If I want to cut off a prop I find a nail that will fit tightly in the shaft hole on the propeller and drill a hole in a board that the nail will slide snugly into. I put the nail through the prop and into the hole in the board. I then clamp the board to my disc sander table and position it so the prop will touch the sander when I rotate the prop. the distance of the board to the sanding disc determines the length of the prop. Below I am cutting a 7x6 prop to 6". When I rotate the prop all the way around it will cut the blades of the prop to the same length.
I save my chipped props to cut down to a shorter length for some of my smaller planes. If the prop has cracks or chips that don't get removed with the sander I throw the prop away.
I save my chipped props to cut down to a shorter length for some of my smaller planes. If the prop has cracks or chips that don't get removed with the sander I throw the prop away.
