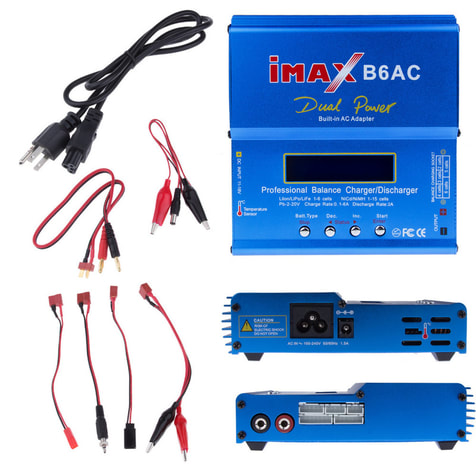
Setting up an IMAX B6AC charger
that has a built in power supply.
that has a built in power supply.

This is my review of the IMax B6AC battery charger, balancer and discharger. This is a simple lower cost charger that will do a lot of things. I have seen similar looking chargers with either 50W or 80W ratings.
This charger has a power plug that will plugs into an outlet. It also has alligator clips to hook it to a car battery. It will charge batteries that have from 2 to 6 cells. If you push the right buttons you can see the voltage of each cell as a battery is charging.
I like to add a balance plug extension and plugged one end into the balance port on the charger so that the battery can be a farther distance from the charger. I had to solder on a XT60 plug to match my battery plugs but have since purchased banana plug to XT60 plug adapters from Banggood. I have posted a link below.
To set up your IMAX B6AC charger for a 1300 mA 3 cell battery.
Plug the charger into the wall. I saw a few sparks as I plugged into the wall but it didn't affect function.
Plug in the power charge cord and plug it into the battery
Plug in the balance extensions or you can plug the balance plug on the battery into the appropriate balance port.
The IMAX B6AC screen will light up and give you some options.
Between batteries and before programing press and hold the "STOP" button to clear the program memory.
In the battery "Program Select" menu select "LIPO BATT" with the "BATT TYPE" button.
To save this setting you must press the "ENTER" button which is also the "START" button
With the right and left status buttons select "LIPO FAST CHARGE"
Press "ENTER" to save this setting.
Select with the arrow keys "2.0 AMPS" or what ever charge rate you would like.
Press "ENTER" to save this setting.
Select with the arrow keys "11.1 VOLTS" for a 3S battery or the equivelent for the battery you are charging.
Hold the "START" button until it goes to "BATTERY CHECK WAIT"
The charger will then prompt you to press "START" to start the charging cycle.
By pushing the "SELECT" buttons you can see the individual voltage of the 3 cells that are in the battery.
The battery charger will alarm when the charging is done.
Press the "STOP" button before disconnecting and starting to charge the next battery.
Go through the menu again and confirm that all the settings are correct or you may not get into the charge program.
To store a battery you need to drop the voltage to 3.7 volts per cell and make sure all the cells are balanced.
Using the battery "Program Select" menu select "LIPO BATT"
To save this setting you must press the "ENTER" button which is also the "START" button
With the right and left status buttons select "LIPO STORAGE"
Press "ENTER" to save this setting.
Select with the arrow keys "1.0 AMPS" or what ever discharge rate you would like.
Press "ENTER" to save this setting.
Select with the arrow keys "11.1 VOLTS" for a 3S battery or the equivelent for the battery you are discharging.
Hold the "START" button until it goes to "BATTERY CHECK WAIT"
The charger will automaticly start the discharging cycle.
More information about how to set up and use the charger for multiple batteries at once.
Here is a link to a Parallel Charging Board.
You can connect multiple batteries with a charging board you can charge more than one similar battery at once. Be very careful to double check that all of your batteries being charged have about the same remaining voltage. If you mix fully charged and uncharged batteries on the charging board you could have a dangerous power surge between the batteries. There are fuses on this charging board to help control power surges if you make a mistake, but don't mix batteries without checking each one before you plug it into the charging board.
I recommend that you only multiple charge 2-3 batteries at a time. If one cell on one battery goes bad you may have trouble with every battery you have plugged in to the charging board at that time. If you have a battery that is over discharged or the cells aren't evenly discharged do not put it on the charging board with other batteries but charge it alone on the charger. I never run the charger at more than 3 Amps although it is rated for more because it does get a little warm.
This battery checker is a great way to make sure that your batteries all have about the same charge and they don't have a damaged cell that could affect all of the batteries on the splitter. Battery Checker
Here is a link to a banana plug to XT60 adapters and 2S/3S/4S balance plug extensions.
Banana plug to XT60 extensions
2S/3S/4S Battery balancer connection extensions
5x - 3S battery balancer plug extensions
-Lee


