
How to Build a Bomb Drop
Enjoy the videos. Think of all the fun stuff you can drop.
Enjoy the videos. Think of all the fun stuff you can drop.
|
|
|
|
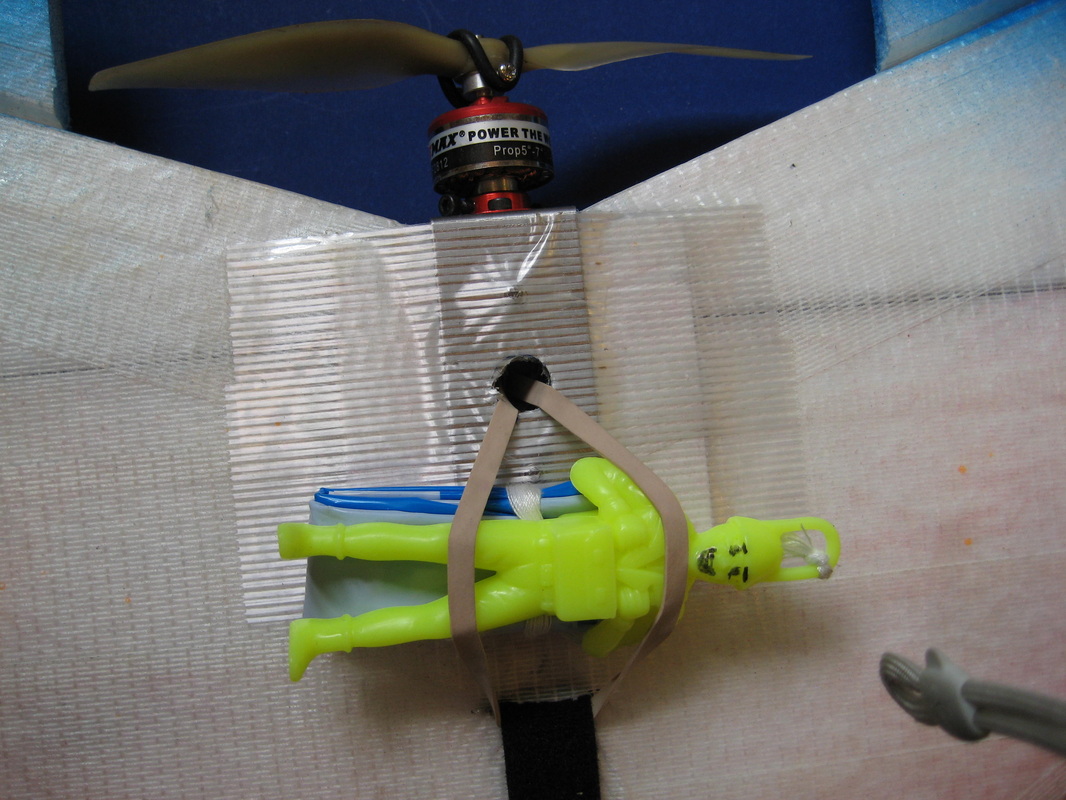
Simple flying wing bomb drop. Servo pulls a pin and rubber band releases and drops anything it is holding. A short loop of string on the end of the rubber band makes it easy to reload and slides easier to come off the rod.
|
|
|
Simple conventional plane bomb drop. Double bomb drop on rudder channel or landing gear channel. A single wire goes through each side of the fuselage held in the middle by an EZ connector. Bombs can be put on each side or under the fuselage and are released when the servo turns and the rod releases a rubber band. The metal tube keeps the wire from tearing the foam. A short loop of string or a washer on the end of the rubber band that slides over the rod makes it easier for the bomb to release from the plane. The plane shown is an Albatross with LED lights. Light sticks on streamers make great night bombs.
|
|
|
How to set up a bomb drop
The simplest bomb drop is to set up a servo to pull a rod that releases a rubber band and anything under the rubber band drops off the plane. This design is easy to add to an existing plane. It is easy to set up and quick to reload, cheap and light. Store purchased or home made parachutes, empty pop cans, water bottles rolls of crape paper or toilet paper streamers can all make good bombs. This system works well enough you can carry most anything that the plane can carry including another small plane and drop it in flight.
I also use a garbage bag with the closed end tied or taped to the front of the plane and cut to a length just past the back of the wing. I can fill with the bag with candy or parachutes and a rubber band goes around the bag end at the back of the wing with one end attached to the pull pin on the bomb drop to hold all the goodies in the bag. When the rubber band is released the bag empties. If your bombs are too light the wind may keep them in the bag.
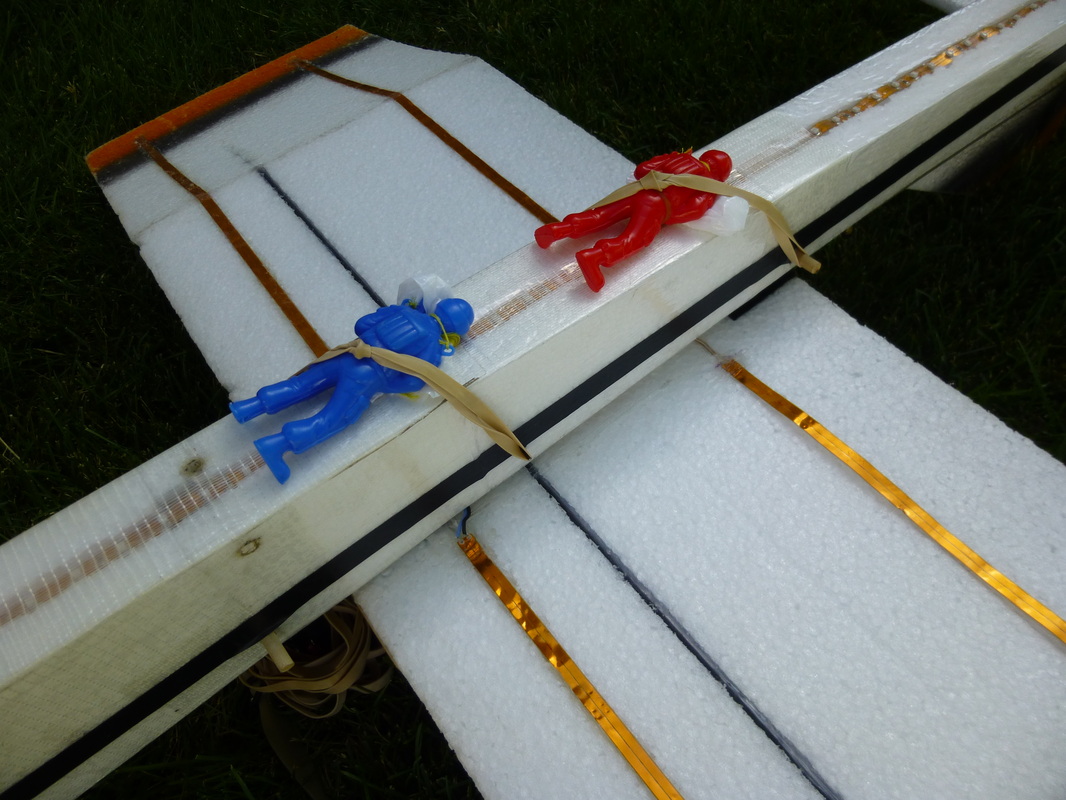
Our local Cub Scouts make parachutes out of one half of a white kitchen garbage bags in their den meetings. Each of the boys colors their parachute with permanent markers so they can tell them apart in the air. They then bring them to the park for us to drop from our planes. It is a great way to introduce them to radio control and makes a great Pack Meeting activity. We often will carry up 3 or more parachutes at a time. On the Storm Chaser I can carry 15 or 20. We drop the parachutes away from the landing area so the boys aren't running across the field where you need to land.
On a flying wing
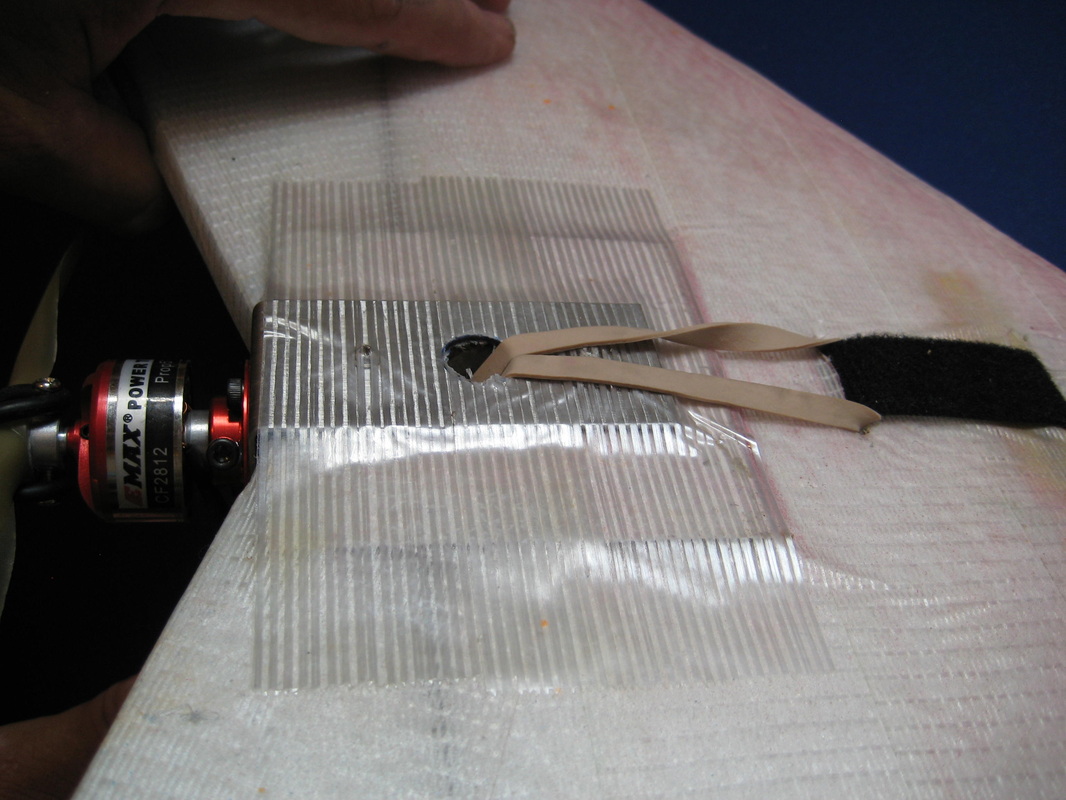
1. Drill a hole thought the Formica and melt a hole through the hole in the motor mount for the rubber band.
2. Install a servo on the top of the plane that will pull the rod and release the rubber band.
3. One end of the rubber band loops through the Velcro on the bottom of the plane that secures the battery.
4. The other end of the rubber band goes up through the hole and is secured with the loose end of the rod.
5. Anything under the rubber band will drop off when the bomb drop is activated.
6. Stop the prop before releasing the bomb so the bomb won't go through the prop.
7. The bomb drop is activated from the transmitter on the landing gear or aux channel.
8. The rod does not fall off the plane if the Z bend comes up from the bottom of the servo arm as shown.
9. You want the bomb under the center of gravity so when the bomb is dropped the CG does not change.
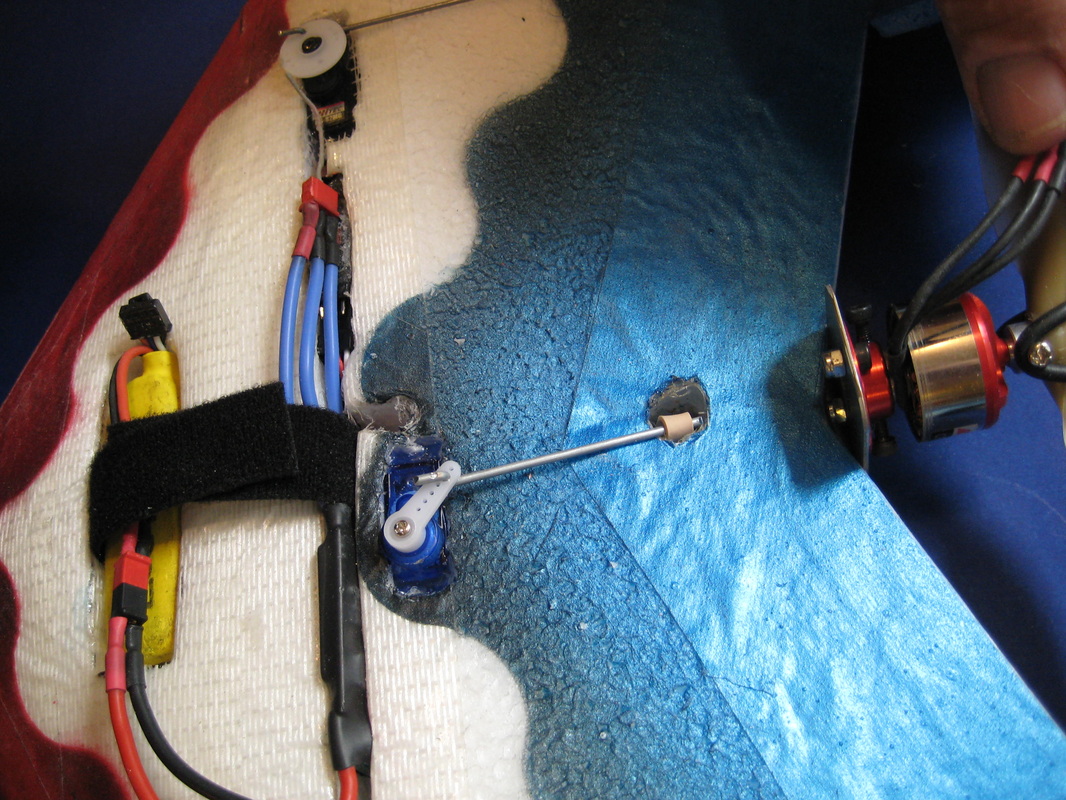
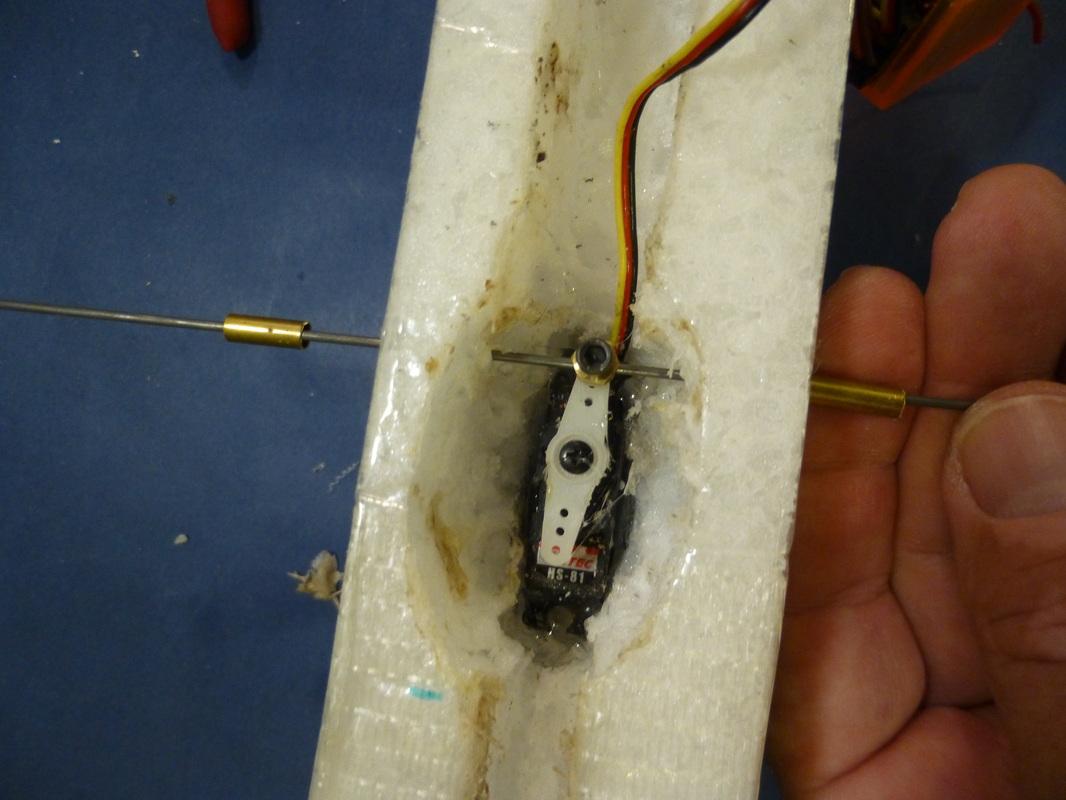
On our Storm Chaser, Albatross or Pelican
1. Use a servo with a long servo arm and an EZ connector on the end of the arm.
2. Install a servo deep in the top of the fuselage out of the way of the rest of your radio.
3. Install the rod out of your normal grasp area on the fuselage so you don't stab yourself on the rod when launching the plane
4. Be careful to make sure it won't damage your wires or unplug your ESC from your receiver!!!
5. Stab a rod through the fuselage so it will go through the EZ connector and then out the other side of the fuselage.
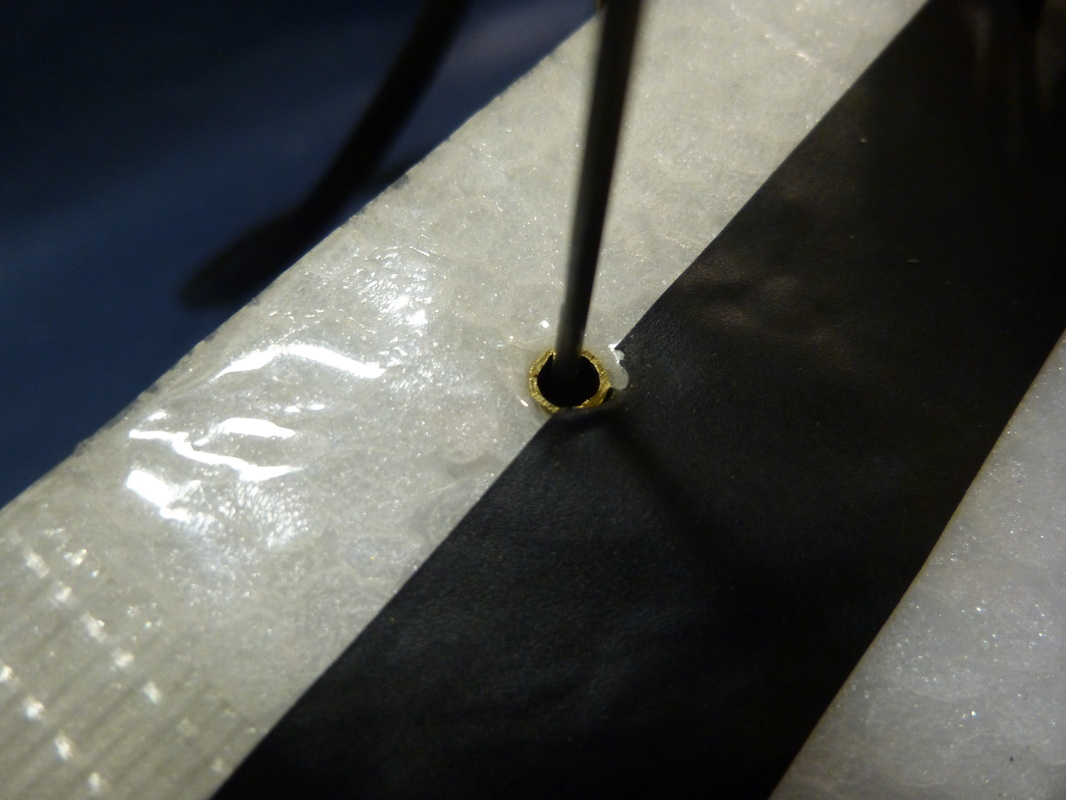
6. Tighten the EZ connector
7. Install a brass tube or washer to prevent the wire from tearing the foam when it has the pressure of the rubber band.
8. Since these planes use the aileron control for rudder you can use the rudder control to drop 2 bombs.
9. If you are flying an aileron version with 4 servos you can use the gear switch to release the bomb.
10. Turn your rudder travel adjustment setting on the transmitter to 125% both directions.
11. Cut the rod so that it has enough length to hold a rubber band on each side
12. Double check that the rod will retract enough the rubber band will come off when the servo is moved.
13. Put one end of the rubber band on the wing dowel, the other side goes over the wire end poking out of the fuselage.
13. You want the bomb under the center of gravity so when the bomb is dropped the CG does not change.
The simplest bomb drop is to set up a servo to pull a rod that releases a rubber band and anything under the rubber band drops off the plane. This design is easy to add to an existing plane. It is easy to set up and quick to reload, cheap and light. Store purchased or home made parachutes, empty pop cans, water bottles rolls of crape paper or toilet paper streamers can all make good bombs. This system works well enough you can carry most anything that the plane can carry including another small plane and drop it in flight.
I also use a garbage bag with the closed end tied or taped to the front of the plane and cut to a length just past the back of the wing. I can fill with the bag with candy or parachutes and a rubber band goes around the bag end at the back of the wing with one end attached to the pull pin on the bomb drop to hold all the goodies in the bag. When the rubber band is released the bag empties. If your bombs are too light the wind may keep them in the bag.
Our local Cub Scouts make parachutes out of one half of a white kitchen garbage bags in their den meetings. Each of the boys colors their parachute with permanent markers so they can tell them apart in the air. They then bring them to the park for us to drop from our planes. It is a great way to introduce them to radio control and makes a great Pack Meeting activity. We often will carry up 3 or more parachutes at a time. On the Storm Chaser I can carry 15 or 20. We drop the parachutes away from the landing area so the boys aren't running across the field where you need to land.
On a flying wing
1. Drill a hole thought the Formica and melt a hole through the hole in the motor mount for the rubber band.
2. Install a servo on the top of the plane that will pull the rod and release the rubber band.
3. One end of the rubber band loops through the Velcro on the bottom of the plane that secures the battery.
4. The other end of the rubber band goes up through the hole and is secured with the loose end of the rod.
5. Anything under the rubber band will drop off when the bomb drop is activated.
6. Stop the prop before releasing the bomb so the bomb won't go through the prop.
7. The bomb drop is activated from the transmitter on the landing gear or aux channel.
8. The rod does not fall off the plane if the Z bend comes up from the bottom of the servo arm as shown.
9. You want the bomb under the center of gravity so when the bomb is dropped the CG does not change.
On our Storm Chaser, Albatross or Pelican
1. Use a servo with a long servo arm and an EZ connector on the end of the arm.
2. Install a servo deep in the top of the fuselage out of the way of the rest of your radio.
3. Install the rod out of your normal grasp area on the fuselage so you don't stab yourself on the rod when launching the plane
4. Be careful to make sure it won't damage your wires or unplug your ESC from your receiver!!!
5. Stab a rod through the fuselage so it will go through the EZ connector and then out the other side of the fuselage.
6. Tighten the EZ connector
7. Install a brass tube or washer to prevent the wire from tearing the foam when it has the pressure of the rubber band.
8. Since these planes use the aileron control for rudder you can use the rudder control to drop 2 bombs.
9. If you are flying an aileron version with 4 servos you can use the gear switch to release the bomb.
10. Turn your rudder travel adjustment setting on the transmitter to 125% both directions.
11. Cut the rod so that it has enough length to hold a rubber band on each side
12. Double check that the rod will retract enough the rubber band will come off when the servo is moved.
13. Put one end of the rubber band on the wing dowel, the other side goes over the wire end poking out of the fuselage.
13. You want the bomb under the center of gravity so when the bomb is dropped the CG does not change.