
|
39" Matador Sloper
$59.95 plus shipping *** Please choose USA or International shipping The drop down price includes plane and shipping. |
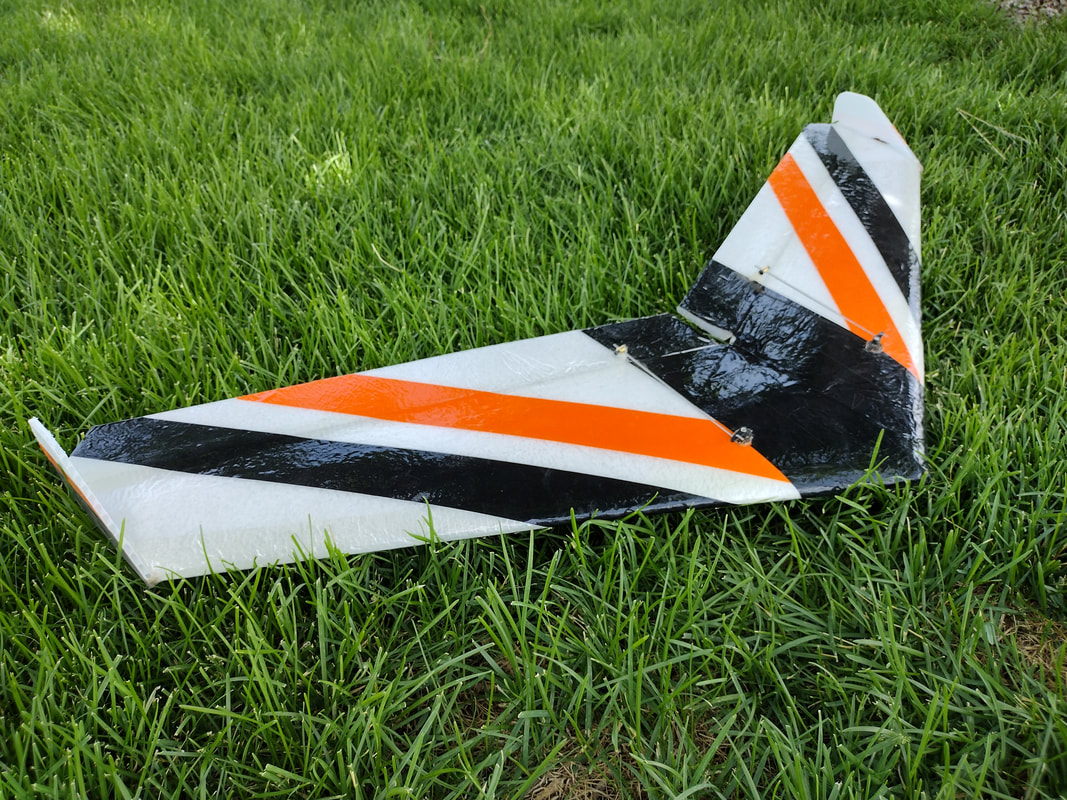
The Matador 39" indestructible EPP laminated mini wing designed for slope soaring. It is a high performance sloper with big plane performance in a wide variety of wind conditions. Flying weight is about 360 grams (13 ounces) including radio and battery with about 6 ounces per foot wing loading. It is stable in low wind and fast in high wind and built to fly combat and survive rough mountain flying sites. Big elevons give it one of the fastest rolls on the slope.
The kit comes with 1 plane in the box for $60 including laminate and hardware. You read correctly, The kit includes laminate and is only $60!!!
The Matador comes with EPP foam cores, EPP elevons, laminate, fins, flat carbon spar, horns and pushrods. The thin high penetration airfoil is thick enough to hide your radio. Designed and built like our power combat planes so it can have hard landings in bushes or rock on a slope and survive. The kit comes with two fins which we have found increase stability and aerobatics.
Our laminate does not need a spray adhesive to get it to stick. It's unique adhesive is activated with a clothing or hobby iron at 180-220 F. Instructions on how to laminate the plane are highlighted in the build videos below.
I like to build with a smaller receiver, 1-5 amp BEC, 9 gm MG90 servos and a 1000 mah 2S battery for weight in the nose. The Matador balances with these components without added nose weight. With this battery I can fly for hours on a single charge since there is no motor running. See the build videos below. This is an easy project that takes about 4 hours to build and laminate.
The CTH Matador is cut from EPP foam and is tough and durable. The 39" EPP foam cores and elevons alone only weigh 2.3 oz making it lighter than balsa but tough for combat. How light can you build it? I built heavier than I had to like I do for combat planes with bidirectional reinforced tape, UV protected 3 mil laminate and a shock cord for penetration and durability and still was only 6 oz a square foot which is light for the slope.
I can carry a stack of flying wings under my arm and throw them in the trunk and they don't get damaged. They are true trunk planes. Watch the videos. You need a couple of these. They are great planes to own that will last.
I have flown slope for more than 35 years. I have designed dozens of flying wings and other planes to be flown on the slope. We also fly powered combat and have learned how to build a plane that can take serious abuse and keep on flying. The Matador is one tough plane. We have researched many products including our spars, E-tape, shock cords and laminate that keep the weight down but add incredible strength and still quick to build.
I built a Matador in a single evening including radio installation. They are quick to build and tough to break.
They are not molded but cut from EPP foam that won't crush and is easy to repair. Color is added after building with colored box tape. It's bright, lightweight and only takes a few minutes to install.
Things to remember when you are trying to maximize lift flying on the slope: The airfoil works best if it is kept clean. Only the servo arms are above the top of the wing and all of the rest of the radio and battery are put in from the bottom of the wing. We do not want any wires or batteries to disrupt the air over the top of the wing and want the radio to hide in the bottom of the wing. The radio and battery are held in with inexpensive but efficient clear 2" packing tape.
There is no radio box but a slit into which we insert the servos at the end and BEC and RX in the middle then cover with tape. The battery is in the nose to balance the plane but even it is fit tightly in the plane to prevent the plane from crushing and also to protect the battery and radio. The plane isn't fiber-glassed but simply laminated with our unique UV shielded laminate that protects the foam and the fiber tape from sun rays.
I have built with both a single fin in the center and fins at the tips that are towed in about 1/8". Both fly well but the tip fins have the advantage at slower speeds. We cut the cores with the tow in angle built in. We also recommend you build with a 1" gap between the elevons so you have a place to grab and hang onto the plane in the wind to make launching easier. I put a finger up through the gap un the elevons so I can pitch the planes like a baseball helping in high wind launches.
Please log in and join the discussion on RCGroups.
Included in the kit:
- 1 EPP foam cores
- 2 x EPP foam elevons
- 2 X fins
- 1 x carbon spars
- 1 x Nylon shock cord
- 2 x elevon horns
- 2 x EZ connectors
- 2 x push rods
- 3 mil laminate
|
|
|
|
|
|
|
|
|
|
|