
Motor Shaft Modification
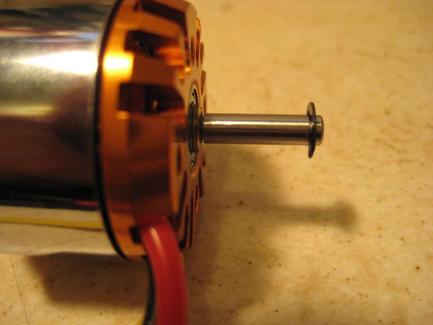
If you’re building a flying wing with a motor in the rear, (a “pusher”), you may be wondering what to do about the motor shaft, which often faces towards the wing
You can leave it like that, and modify the wing or Formica plates as necessary to accommodate the shaft. Then, you’ll need a hardware kit for the motor, with a nose cone assembly to hold your prop in place.
Be careful if you are going to use bigger motors that are pulling not pushing. Using a prop saver that holds the prop in place with an O-ring may not be strong enough to keep the prop from flying off the motor. On bigger motors you will be safer to use the hardware that comes for your size of motor.
However, if you’d like the shaft to come off the back of the plane, then just use a prop saver to hold on the prop, you can tap the shaft through. Here’s how:
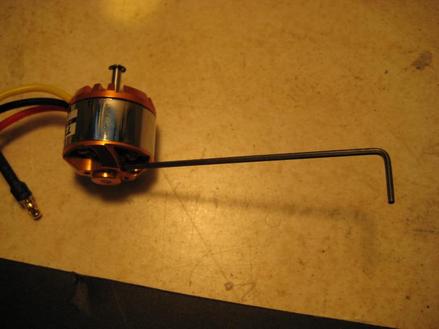
First, there is a false rumor that the bearings get damaged with this modification. The bearings are not attached to the shaft, they only guide it. This can be proven by removing the E-clip on the back of the motor and pulling the bell and shaft out of the bearings to see inside.
Watch the following video. It will show you how to modify your motor and prop adapter.
You can leave it like that, and modify the wing or Formica plates as necessary to accommodate the shaft. Then, you’ll need a hardware kit for the motor, with a nose cone assembly to hold your prop in place.
Be careful if you are going to use bigger motors that are pulling not pushing. Using a prop saver that holds the prop in place with an O-ring may not be strong enough to keep the prop from flying off the motor. On bigger motors you will be safer to use the hardware that comes for your size of motor.
However, if you’d like the shaft to come off the back of the plane, then just use a prop saver to hold on the prop, you can tap the shaft through. Here’s how:
First, there is a false rumor that the bearings get damaged with this modification. The bearings are not attached to the shaft, they only guide it. This can be proven by removing the E-clip on the back of the motor and pulling the bell and shaft out of the bearings to see inside.
Watch the following video. It will show you how to modify your motor and prop adapter.
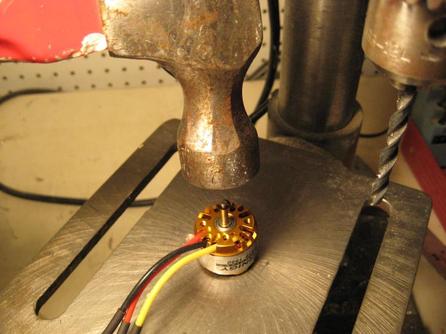
The following method uses a hammer on a motor that actually had two E-clip positions on the motor shaft.
Loosen the set screw on the bell with an Allen wrench that holds the shaft in place.
GENTLY tap the shaft down through the motor bell. Don’t damage the bell or windings. Some motors require more force than others, but keep the tapping controlled.
One of the flyers has used the drill press to push the shaft through the bell rather than tapping with a hammer. We also were brainstorming that you could also use a C-Clamp or vice to push it through the bell of the motor to the right depth but you will need to drill a hole in a piece of wood for the shaft to be pushed into.
One of the flyers has used the drill press to push the shaft through the bell rather than tapping with a hammer. We also were brainstorming that you could also use a C-Clamp or vice to push it through the bell of the motor to the right depth but you will need to drill a hole in a piece of wood for the shaft to be pushed into.
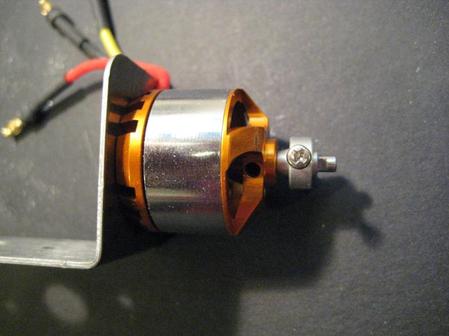
Re-tighten the set screw on the bell. Now you can put a prop adapter on the shaft. Some of the motors have 5mm shafts and you won't find a prop saver/adapter that size. For those motors I drill out a 4mm prop adapter to 5mm. Do not use a prop adapter on larger front mount motors that are pulling. The risk of the prop saver coming off because an O ring broke and causing damage is high with a puller prop and a high power motor. I have not had trouble with pusher props and the prop adapters.
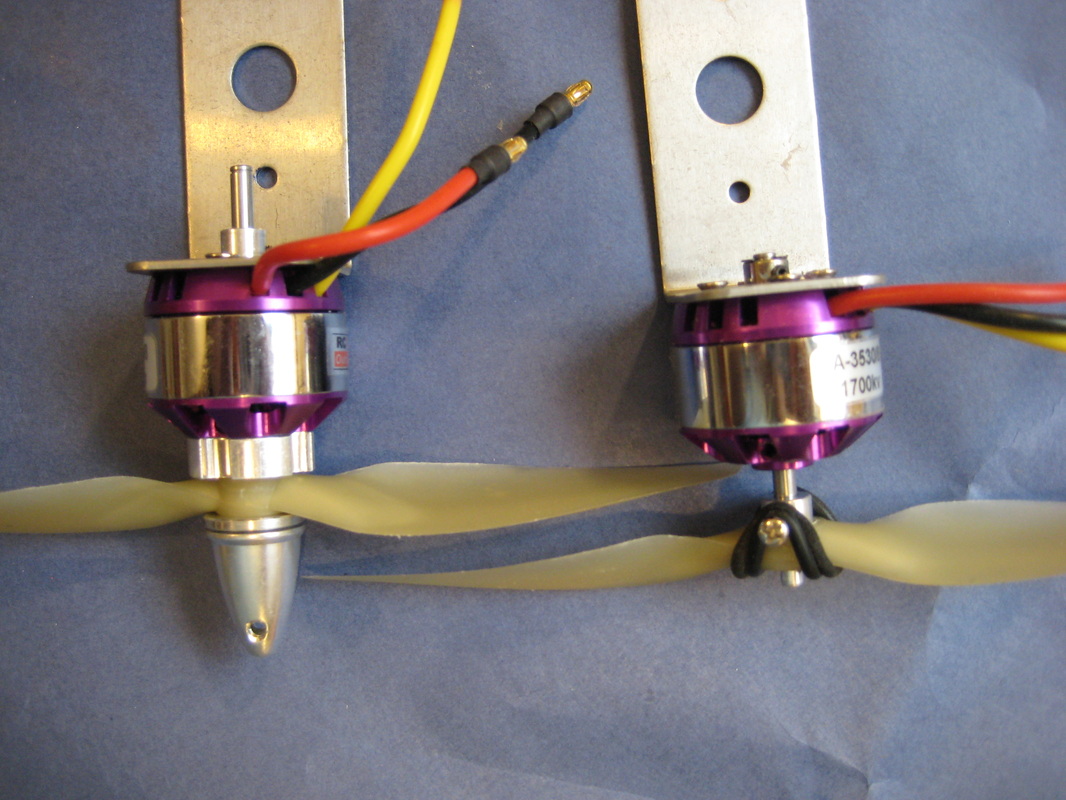
You don't have to modify the motor. Shown here are 2x 3530s with different set ups. You can still use the parts the manufacturer provides and extend the shaft into the wing. In many cases the design of the motor requires you to drill a hole for the motor shaft that goes into the pod, motor mount block or into the foam of the wing. As long as the shaft isn't rubbing there are many options of how to set it up. I like to put a wheel collar on the motor shaft to keep the shaft from pulling out.
|